Set up xCluster Disaster Recovery
Prerequisites
By default, xCluster Disaster Recovery is not enabled. To enable the feature, set the Enable disaster recovery Global Configuration option (config key yb.xcluster.dr.enabled) to true. Refer to Manage runtime configuration settings. Note that only a Super Admin user can modify Global configuration settings.
Create universes
Create two universes, the DR primary universe which will serve reads and writes, and the DR replica.
Ensure the universes have the following characteristics:
-
Both universes are running the same version of YugabyteDB (v2.18.0.0 or later).
-
Both universes have the same encryption in transit settings. Encryption in transit is recommended, and you should create the DR primary and DR replica universes with TLS enabled.
-
They can be backed up and restored using the same storage configuration.
-
They have enough disk space to support storage of write-ahead logs (WALs) in case of a network partition or a temporary outage of the DR replica universe. During these cases, WALs will continue to write until replication is restored. Consider sizing your disk according to your ability to respond and recover from network or other infrastructure outages.
-
DR enables Point-in-time-recovery (PITR) on the DR replica, requiring additional disk space for the replica.
PITR is used by DR during failover to restore the database to a consistent state. Note that if the DR replica universe already has PITR configured, that configuration is replaced by the DR configuration.
You can change the retention period for PITR used for DR by changing the following runtime configuration:
yb.xcluster.transactional.pitr.default_retention_periodThe default value is 3 days.
-
Neither universe is already being used for xCluster replication.
Prepare your database and tables on the DR primary. The DR primary can be empty or have data. If the DR primary has a lot of data, the DR setup will take longer because the data must be copied in full to the DR replica before on-going asynchronous replication starts.
On the DR replica, create a database with the same name as that on the DR primary. During initial DR setup, you don't need to create objects on the DR replica. DR performs a full copy of the data to be replicated on the DR primary, and automatically creates tables and objects, and restores data on the DR replica from the DR primary.
After DR is configured, the DR replica will only be available for reads.
Best practices
-
Monitor CPU and keep its use below 65%.
-
Monitor disk space and keep its use under 65%.
-
Set the YB-TServer log_min_seconds_to_retain flag to 86400 on both DR primary and replica.
This flag determines the duration for which WAL is retained on the DR primary in case of a network partition or a complete outage of the DR replica. For xCluster DR, you should set the flag to a value greater than the default. The goal is to retain write-ahead logs (WALs) during a network partition or DR replica outage until replication can be restarted. Setting this to 86400 (24 hours) is a good rule of thumb, but you should also consider how quickly you will be able to recover from a network partition or DR replica outage.
In addition, during an outage, you will need enough disk space to retain the WALs, so determine the data change rate for your workload, and size your disk accordingly.
-
Set a replication lag alert for the DR primary to be alerted when the replication lag exceeds acceptable levels.
-
Add new tables and databases to the DR configuration soon after creating them, and before performing any writes to avoid the overhead of a full copy.
Set up disaster recovery
To set up disaster recovery for a universe, do the following:
-
Navigate to your DR primary universe and select xCluster Disaster Recovery.
-
Click Configure & Enable Disaster Recovery.
-
Select the universe to use as the DR replica, then click Next: Select Databases.
-
Select the databases to be copied to the DR replica for disaster recovery.
You can add databases containing colocated tables to the DR configuration as long as the underlying database is v2.18.1.0 or later. Colocated tables on the DR primary and replica should be created with the same colocation ID if they already exist on both the DR primary and replica prior to DR setup. Refer to xCluster and colocation.
YugabyteDB Anywhere checks whether or not data needs to be copied to the DR replica for the selected databases and its tables.
-
If data needs to be copied, click Next: Confirm Full Copy, and select a storage configuration.
The storage is used to transfer the data to the DR replica database. For information on how to configure storage, see Configure backup storage.
-
Click Next: Confirm Alert Threshold.
If you have set an alert for replication lag on the universe, the threshold for alerting is displayed.
-
Click Confirm and Enable Disaster Recovery.
YugabyteDB Anywhere proceeds to set up DR for the universe. How long this takes depends mainly on the amount of data that needs to be copied to the DR replica.
Monitor replication
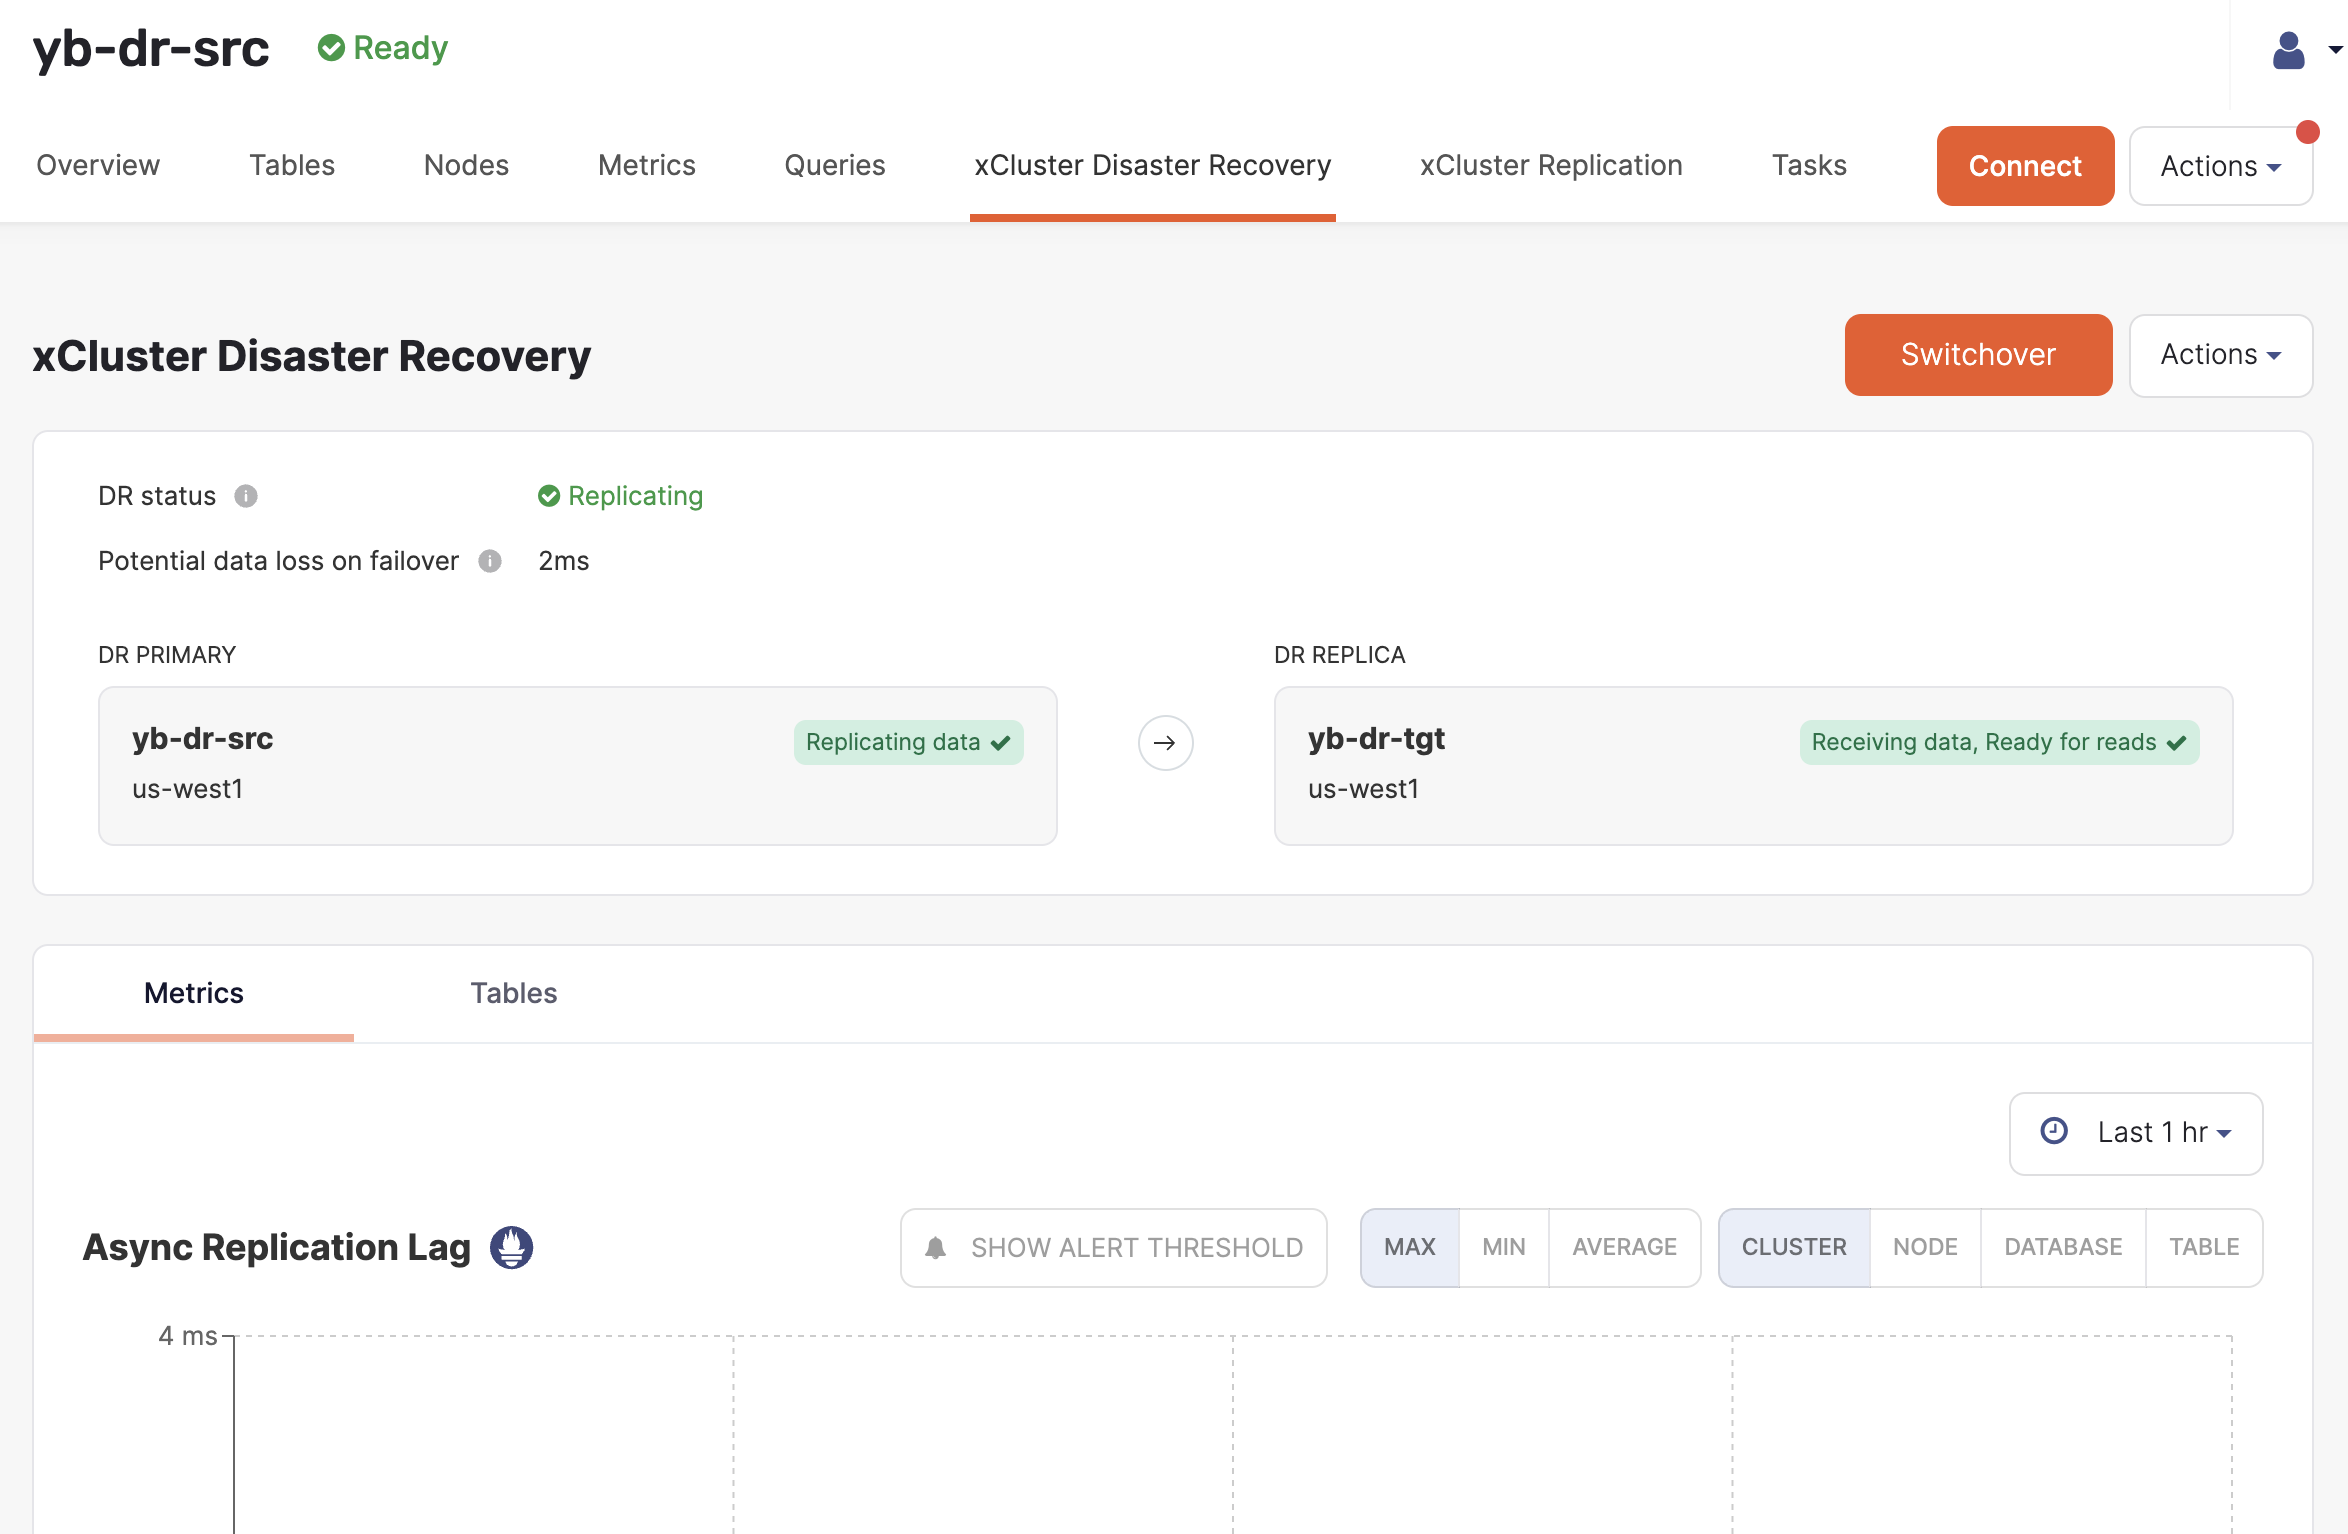
After DR is set up, the xCluster Disaster Recovery tab displays the DR status.

Metrics
In addition, you can monitor the following metrics on the xCluster Disaster Recovery > Metrics tab:
-
Async Replication Lag
The network lag in microseconds between any two communicating nodes.
If you have set an alert for replication lag, you can also display the alert threshold.
-
Consumer Safe Time Lag
The time elapsed in microseconds between the physical time and safe time. Safe time is the time (usually in the past) at which the database or tables can be read with full correctness and consistency. For example, even though the actual time may be 3:00:00, a query or read against the DR replica database may be able to only return a result as of 2:59:59 (that is 1 second ago) due to network lag and/or out-of-order delivery of datagrams.
-
Consumer Safe Time Skew
The time elapsed in microseconds for replication between the most caught up tablet and the tablet that lags the most on the DR replica. This metric is available only on the DR replica.
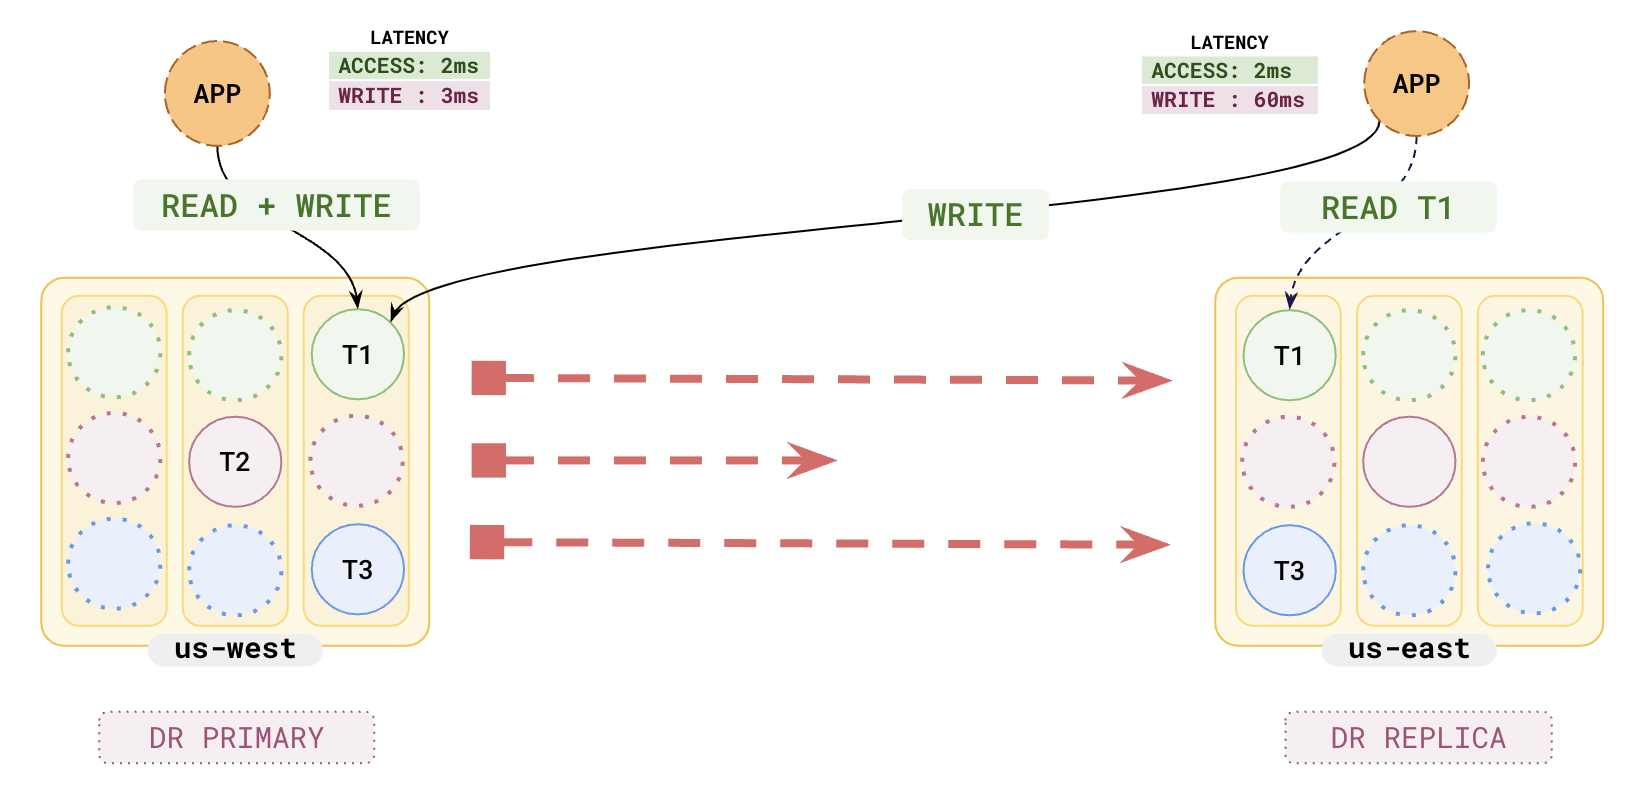
Consider the following scenario.

- Three transactions, T1, T2, and T3, are written to the DR primary at 0.001 ms, 0.002 ms, and 0.003 ms respectively.
- The replication lag for the transactions are as follows: Repl_Lag(T1) = 10 ms, Repl_Lag(T2) = 100 ms, Repl_Lag(T3) = 20 ms.
The state of the system at time t = 50 ms is as follows:
- T1 and T3 have arrived at the DR replica. T2 is still in transit.
- Although T3 has arrived, SQL reads on the DR replica only see T1 (T3 is hidden), because (due to T2 still being in transit, and T3 being written on the DR primary after T2) the only safe, consistent view of the database is to see T1 and hide T3.
- Safe time is the time at which T1 was replicated, namely t = 0.001 ms.
- Safe time lag is the difference between the current time and the safe time. As of t = 50 ms, the safe time lag is 49.999 ms (50 ms - 0.001 ms).
If a failover were to occur at this moment (t = 50 ms) the DR replica will be restored to its state as of the safe time (that is, t = .001 ms), meaning that T1 will be visible, but T3 will be hidden. T2 (which is still in transit) is currently not available on the DR Replica, and will be ignored when it arrives.
In this example, the safe time skew is 90 ms, the difference between Repl_Lag(T1) and Repl_Lag(T3).
Tables
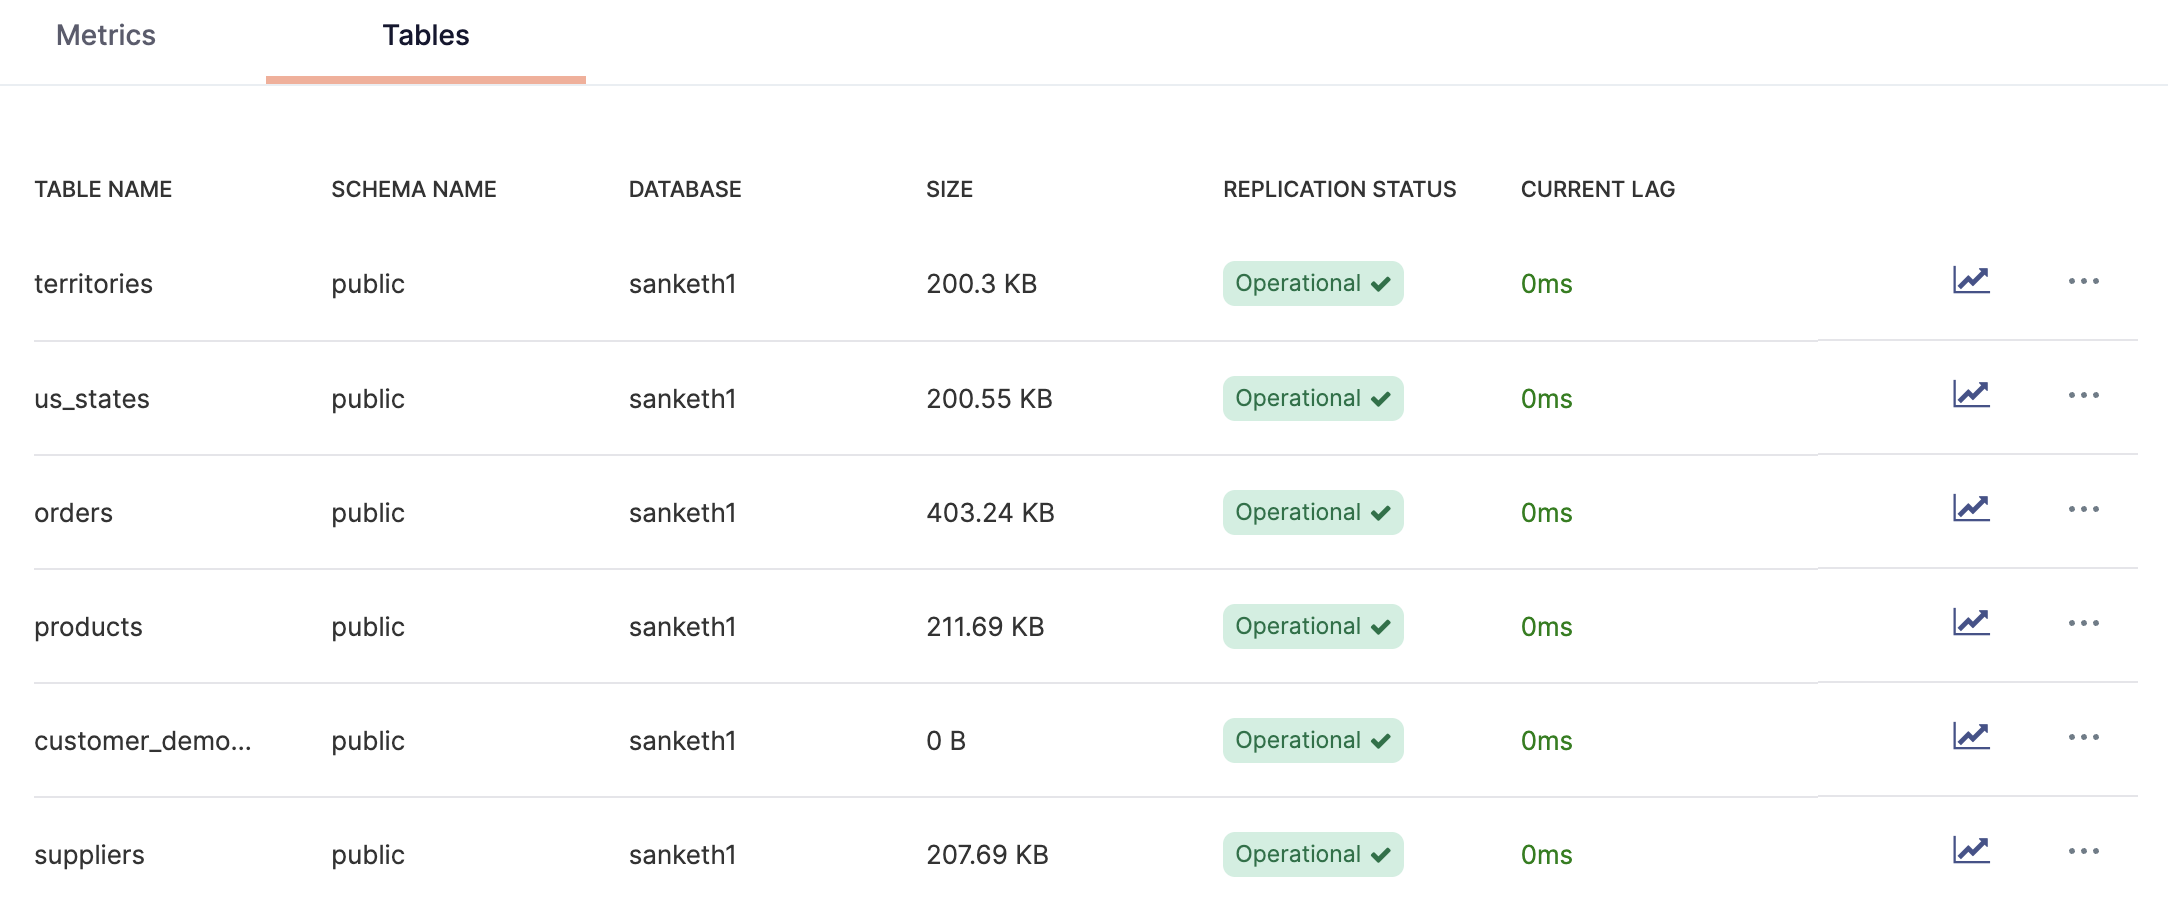
The xCluster Disaster Recovery tab also lists all the tables in replication and their status on the Tables tab.

-
To find out the replication lag for a specific table, click the graph icon corresponding to that table.
-
To check if the replication has been properly configured for a table, check the status. If properly configured, the table's replication status is shown as Operational.
The status will be Not Reported momentarily after the replication configuration is created until metrics are available for the replication configuration. This should take about 10 seconds.
If the replication lag increases beyond maximum acceptable lag defined during the replication setup or the lag is not being reported, the table's status is shown as Warning.
If the replication lag has increased so much that resuming or continuing replication cannot be accomplished via WAL logs but instead requires making another full copy from DR primary to DR replica, the status is shown as Error: the table's replication stream is broken, and restarting the replication is required for those tables. If a lag alert is enabled on the replication, you are notified when the lag is behind the specified limit, in which case you may open the table on the replication view to check if any of these tables have their replication status as Error.
If YugabyteDB Anywhere is unable to obtain the status (for example, due to a heavy workload being run on the universe) the status for that table will be UnableToFetch. You may refresh the page to retry gathering information.
-
To delete a table from the replication, click ... > Remove Table. This removes both the table and its index tables from replication. If you decide to remove an index table from the replication group, it does not remove its main table from the replication group.
Set up replication lag alerts
Replication lag measures how far behind in time the DR replica lags the DR primary. In a failover scenario, the longer the lag, the more data is at risk of being lost.
To be notified if the lag exceeds a specific threshold so that you can take remedial measures, set a Universe alert for Replication Lag. Note that to display the lag threshold in the Async Replication Lag chart, the alert Severity and Condition must be Severe and Greater Than respectively.
To create an alert:
-
Navigate to Admin > Alert Configurations > Alert Policies.
-
Click Create Alert Policy and choose Universe Alert.
-
Set Policy Template to Replication Lag.
-
Enter a name and description for the alert policy.
-
Set Target to Selected Universes and select the DR primary.
-
Set the conditions for the alert.
- Enter a duration threshold. The alert is triggered when the lag exceeds the threshold for the specified duration.
- Set the Severity option to Severe.
- Set the Condition option to Greater Than.
- Set the threshold to an acceptable value for your deployment. The default threshold is 3 minutes (180000ms).
-
Click Save when you are done.
When DR is set up, YugabyteDB Anywhere automatically creates an alert for YSQL Tables in DR/xCluster Config Inconsistent With Primary/Source. This alert fires when tables are added or dropped from DR primary's databases under replication, but are not yet added or dropped from the DR configuration.
For more information on alerting in YugabyteDB Anywhere, refer to Alerts.
Add a database to an existing DR
Note that, although you don't need to create objects on the DR replica during initial DR setup, when you add a new database to an existing DR configuration, you do need to create the same objects on the DR replica. If DR primary and replica objects don't match, you won't be able to add the database to DR.
To add a database to DR, do the following:
-
Navigate to your DR primary universe and select xCluster Disaster Recovery.
-
Click Actions > Select Databases and Tables.
-
Select the databases to be copied to the DR replica for disaster recovery.
You can add databases containing colocated tables to the DR configuration as long as the underlying database is v2.18.1.0 or later. Colocated tables on the DR primary and replica should be created with the same colocation ID if they already exist on both the DR primary and replica prior to DR setup. Refer to xCluster and colocation.
-
Click Validate Selection.
YugabyteDB Anywhere checks whether or not data needs to be copied to the DR replica for the selected databases and its tables.
-
If data needs to be copied, click Next: Confirm Full Copy.
-
Click Apply Changes.
YugabyteDB Anywhere proceeds to copy the database to the DR replica. How long this takes depends mainly on the amount of data that needs to be copied.
Change the DR replica
You can assign a different universe to act as the DR replica.
To change the universe that is used as a DR replica, do the following:
-
Navigate to your DR primary universe and select xCluster Disaster Recovery.
-
Click Actions and choose Change DR Replica Universe.
-
Enter the name of the DR replica and click Next: Confirm Full Copy.
-
Click Apply Changes.
This removes the current DR replica and sets up the new DR replica, with a full copy of the databases if needed.
Restart replication
Some situations, such as extended network partitions between the DR primary and replica, can cause a permanent failure of replication due to WAL logs being no longer available on the DR primary.
In these cases, restart replication as follows:
-
Navigate to the universe xCluster Disaster Recovery tab.
-
Click Actions and choose Advanced and Resync DR Replica.
-
Select the databases to be copied to the DR replica.
-
Click Next: Confirm Full Copy.
-
Click Create a New Full Copy.
This performs a full copy of the databases involved from the DR primary to the DR replica.
Remove disaster recovery
To remove disaster recovery for a universe, do the following:
-
Navigate to your DR primary universe.
-
On the xCluster Disaster Recovery tab, click Actions and choose Remove Disaster Recovery.